
The TASKING License Management System (TLM) works with TASKING products released during and after 2014. All TASKING toolsets are subject to the terms and conditions of the Software License Agreement.
For detailed information about the TASKING License Management (TLM) please see the online manual:
The specific license type for your toolset will determine its allowed usage and transferability. The TLM license key that you receive from TASKING will automatically configure the license type for you.
Node-Locked License
Node licenses locks your software to the computer it was installed on. For installation information for this license type please see:
- Installing Server-Based Licenses
- Installing Client-Based Licenses
Floating License
Floating licenses are located on a license server and can be used by multiple users on a network. For installation information for this license type please see:
- Installing Server-Based Licenses
License Service Types
The license service type specifies the process used to validate the license.
Client-Based (Standalone): License and all associated information is stored on the user’s computer. This service type is available for node-locked licenses only.
Server-Based (Network): License and all associated information is stored on a licensing server that runs on your company's network or TASKING licensing servers. This service type is available for both node-locked and floating licenses.
A license key is required to install and validate all TASKING products. If you have not received a key follow the steps below to obtain one.
Obtaining a Server-Based License (Floating or Node-Locked)
- Order a TASKING product from TASKING or one of its certified distributors.
- Your license key will be sent via email or regular mail.
- The license server will bind the license to the first computer that uses the license.
Obtaining a Client-Based License (Node-Locked)
- Download the getcid program on the computer you want to install a TASKING product on.
- Execute the getcid program and make note of your computer ID.
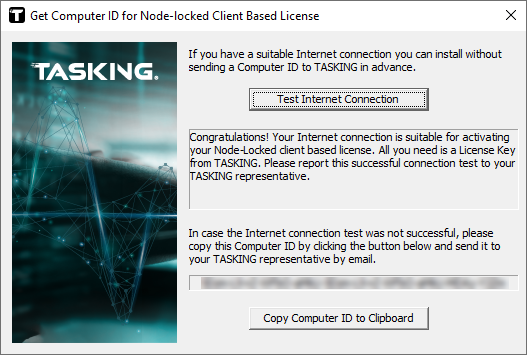
- Order a TASKING product from TASKING or one of its certified distributors and provide your Computer ID.
- A license key and file will be sent to you via email or regular mail.
Installing Server-Based Licenses (Floating or Node-Locked)
Please Note: If you want to use a local license server first install the local license server before continuing to step 1.
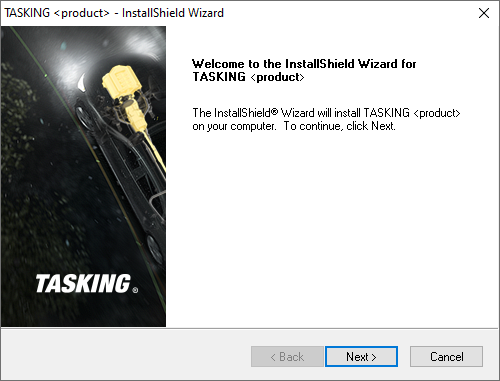
- Begin the installation process for your TASKING product.
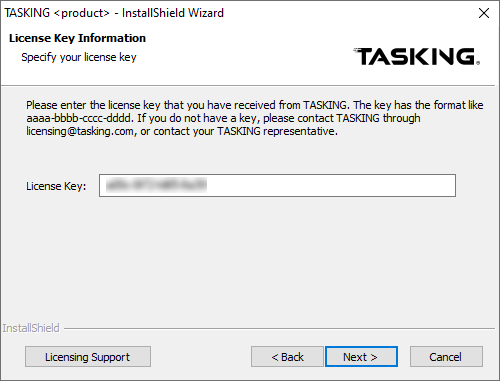
- Enter your provided license key.
The installation program tries to retrieve the license information from a remote license server. Wait until the license information is retrieved. If the license information is retrieved successfully subsequent dialogs are already filled-in and you only have to confirm the contents of the dialogs by clicking the Next button. If the license information is not retrieved successfully you have to enter the information by hand.
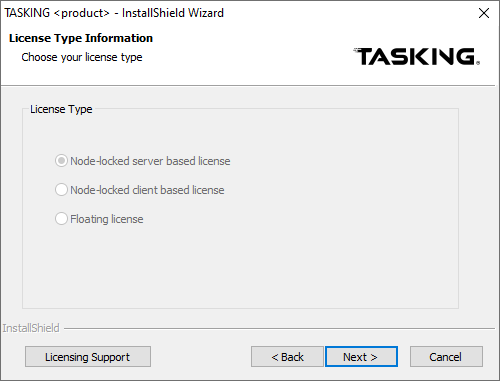
- Select the license type. If it is already filled in and grayed out you can just click Next.

or
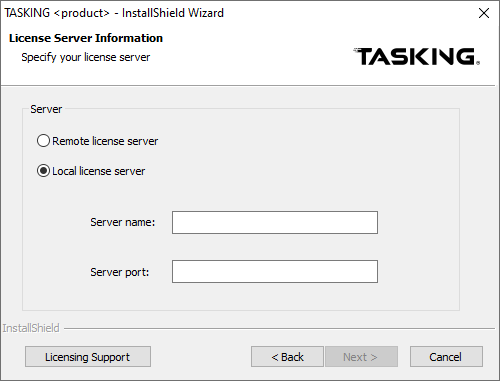
- (For floating licenses only) Select Remote license server or Local license server.
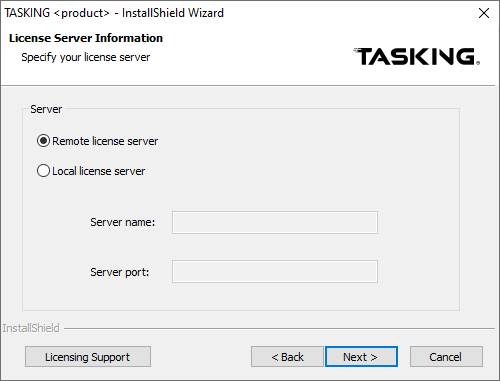
(For local license servers only) Enter the server name and port number of the local license server.
- Click Next and follow the rest of the instructions to complete the installation.
Installing Client-Based Licenses (Node-Locked)
- Begin the installation process for your TASKING product.
- Enter your provided license key.
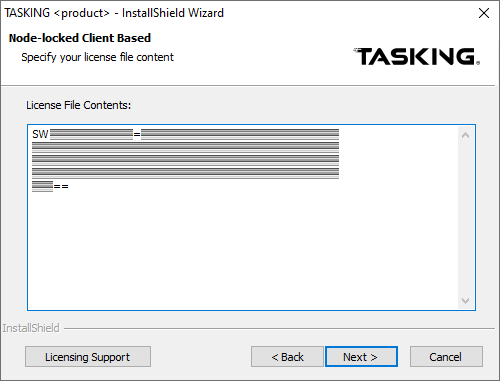
- Select Node-locked client based license, then select Next to continue.

- Enter the contents of your licensing file (licfile.txt is stored in the etc directory of your product).
- Click Next and follow the rest of the instructions to complete the installation.
Whenever you want to restrict license access to your local office network of your companies Intranet, you can install a local license server that does not require any Internet access. For this, please follow the next steps:
- Download the local License Server at our Support Center under LICENSING. For the Support Center you need a login. In case you do not have that yet, please request one by email with your details at sales.operations@tasking.com.
- Install the Local License Server on the computer which is used as the license server.
- Open a command prompt as Administrator from the bin directory of the just installed license server (for example C:\Program Files\TASKING\taskinglm v2.0r1\bin) and run the following command to obtain the security ID:
licd -I
- Send this security ID to your TASKING contact person. It can be marked (right-click -> Mark) and copied (Enter) within the command prompt.
- You will receive an email in return with the license key for your local license server, attached as file licdopt.txt. Save this file into directory C:\Tasking\licdopt.txt
- In the meanwhile, a second email is being sent to you with a 16 character license key (used for installing the TASKING product on your clients) and the license data for your product. Copy this license data to file C:\Tasking\licdfile.txt
- Add the following line to file licdopt.txt:
LICD_LICFILE = C:\Tasking\licdfile.txt
- To install your local license server as a service, open the above-mentioned command prompt as Administrator from the bin directory again, and run the command:
licd --install
- Finally, start this service by running the command:
net start "TASKING License Service"
To install the TASKING product on your clients, follow the next steps:
- Install the TASKING Product and fill in the 16 character license key when asked for. Click Next to continue.
- Select Local license server and specify the Server name and Server port number of your local license server (default port 9090).
- Click Finish to complete the installation.
For more detailed information about the license manager, please refer to Chapter 3. Local License Server from our TLM manual.
A node-locked license or a Local License Server license is tied to the Computer ID of your computer or the Security ID of your license server. At some point, it may be necessary to use a different machine to host the license, for example, if one of your computers or servers needs to be replaced. This will result in a so-called "rehost" request.
To rehost your license, submit a rehost request with the following information:
-
Company name
-
Reason for the rehost request
-
Serial number and license key (or complete license file)
-
For a node-locked license, your new Computer ID
-
For a Local License Server license, the Security ID of your new server
Please send this info to your TASKING contact person. If any fees are due for the requested rehost or a signed Letter of Destruction is required, TASKING will contact you first before proceeding with the request.
How to find the serial number?
From Eclipse, open menu Help => About <product name> => Installation Details => TASKING License
From a command prompt, the Serial Number can be obtained by running the compiler with option -V, for example:
ctc -V
How to find the license key?
The 16-character node-locked license key can be found in file <install>\etc\licopt.txt.
The license key of your local License Server can be found in file licdopt.txt (default in: C:\Tasking).
How to get your new Compter ID (CID) for rehosting a node-locked license?
Download and run the getcid program on the new computer.
How to get your new Security ID (SID) for rehosting a Local License Server license?
-
Install the TASKING Local License Server on the new server
-
Open a command prompt and run licd -I to obtain the security ID
-
For more detailed information, see "How to install a local license server"
If you normally use a floating license but do not have access to a license server, for example on a business trip, you can borrow a license. This turns one floating license seat into a node-locked license for a defined number of days. A borrowed floating license seat is not available to other users during that time. You can borrow a license for a maximum of 128 days, where a day means 24 hours.
The license key itself includes information about whether the license supports the use of the borrow feature or not. If this feature is not enabled for your license, please send an email to licadmin@tasking.com, including the serial number of your license and the request to have the borrow feature enabled for the license.
Note: When you need to borrow different versions of the same product, you need to execute the borrowing process for every single version/revision of the product.
Depending on your TASKING product, several variants of the licborrow utility are available. A GUI variant of licborrow is present in the bin directory of the installed TASKING product on Windows and accessible through the Windows Start menu. If you prefer using a command-line variant, download it from https://www.tasking.com/support/tlm/downloads.
Follow one of the guidelines below to borrow a license, based on your situation.
Borrow a license on Windows using the GUI based licborrow
- From the Start menu, select TASKING <product name> <version> -> Borrow License. The following Borrow License dialog or similar dialog appears:
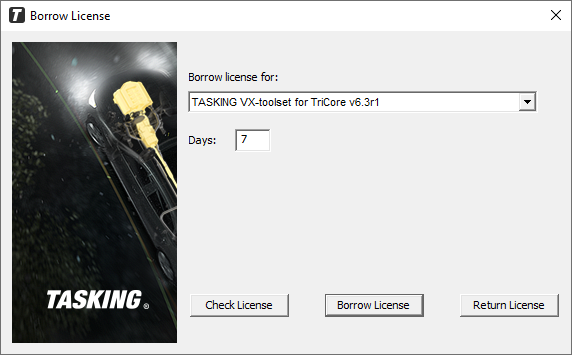
- From the Borrow license for list, select the product for which you want to borrow a license.
- Enter the number of days you want to borrow the license, and click Borrow License.
Borrow a license on Windows using the command line based licborrow
- Download the command line tool licborrowcmd.exe from https://www.tasking.com/support/tlm/downloads.
-
To get a list of available products, in a Windows command prompt, enter:
licborrowcmd -l
This results in a list of installed TASKING products. For example:
SW160800 v6.0r1 TASKING VX-toolset for TriCore
SW160800 v6.1r1 TASKING VX-toolset for TriCore
SW160800 v6.2r2 TASKING VX-toolset for TriCore
SW160800 v6.3r1 TASKING VX-toolset for TriCore -
Borrow a license. For example, 7 days (-d option) for SW160800 v6.3r1:
licborrowcmd -d7 SW160800 v6.3r1
If borrowing is successful, you get the response:
License for SW160800 v6.3r1 successfully borrowed for 7 days from lic1.tasking.com
You can now use your computer in the field.
Borrow a license on Linux on the command line
Linux installations only have a command line interface for licborrow.
From the bin directory of the TASKING product, run the following command:
licborrow -d7 SW160800 v6.3r1
End of borrowing
Normally, the borrowing period ends when the number of days has passed. However, if you want to return a borrowed license earlier, you can set the number of days to 0 (zero).
Use the GUI tool or command-line tool the same way as described above and enter 0 for the number of days, or in the GUI tool click Return License. The tool will respond with, for example:
License for SW160800 v6.3r1 successfully returned to lic1.tasking.com